People in Places - 3 : 3D prints
< previous part: procedural textures < | > next part: slicer settings>
People in Places: Mountains
 |
 |
3D Printing
overview
- So. You got your character in its 3D file. Mine is in .blend format.
- You need to export it to .stl,
- then import it in a 3D Slicer software like Bambu Studio or Cura Ultimaker, slice it
- then export it to the right format (mine is .gcode.m3f, but I assume other formats exist that do the same),
- then give it to the printer to print.
- for reference, most of my characters are about 13cm high and took about 5-8 hours to print, with the smallest one at 2 hours (photographer; about 9x9x9 cm) and the biggest one (spelunker; about 25x20x25 cm) at 31 hours. You can check that when you slice your file: it tells you how long it’ll take and how much filament you’ll use (by weight and length). I had the fuzzy skin and 0.12mm options, which seem to take twice as long to print.
But it’s not quite that easy, especially if you use 3D files you made yourself, that haven’t been tested yet (ones you buy/download would probably be much simpler to use (but less fun!) because the testing process will have already happened)
It feels like I made all the mistakes that could ever be made but I’m sure I’ll find exciting new ones next time I 3D-print. I’ll try to list them here:
in your 3D modeling software
- the very first thing you need to do, if you’ve modeled it as a 3D character (in-computer) and not a 3D figurine (in physical space), is check that it can stand. 3D inside the computer can fly, but 3D prints are beholden to real-world physics. I added a base because I liked the way it looked (and I had several characters with decor elements that didn’t touch) but you might prefer it differently.
| character for 2D print | character for 3D print |
 |
 |
 |
 |
 |
 |
- make sure the underside of your sculpture is perfectly flat: go in side view (transparent/wireframe view), select all bottom vertices, scale them to 0 on the Z axis (SZ0). Be very careful that your transformation origin be “center”, that no Proportional Editing (O) be active, and that your axes be in Global mode. Those are the default values but maybe you needed to change them while working and didn’t set them back, who knows.
- If you’re asking yourself whether something is too thin, the answer is always yes. If you’re not asking yourself that, you’re wrong and you should. Remember the ability to zoom almost indefinitely is specific to computer-dwelling files and does not translate to the real-world physics of 3D-printing filaments.
-
- If you’ve got, say, bird legs or beaks, radio antennae, something like that, that is very thin by design and will hold something else, then select the edge loops (so in Edge selection mode, not Vertices or Faces; alt clic, transform origin: individual; so that it gets thicker but not longer) and scale them to 1.5 or 2. It will look too big and clunky. Ignore it. Save and close the file, go do something else, open it again. Now it looks ok. Scale it to 1.5 again. Go do something else. Open it again. it should now be the right size.
-
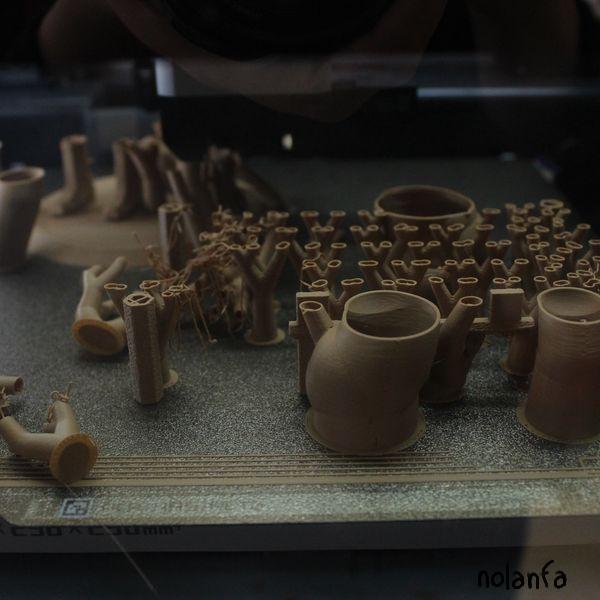
- If you don’t do that, the thin part will either not print or print very thin and fragile, and the part it’s supporting will fall over the course of the printing. Then the printer will try to print over this layer that isn’t there because it didn’t print or fell over; and it will extrude some filament, but the filament will stay attached to the head and make spaghetti on the next part that is printed, and not print this one feetless part.
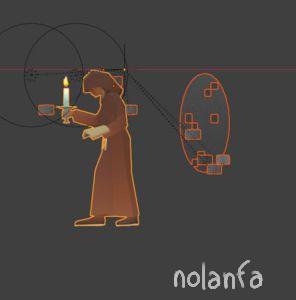
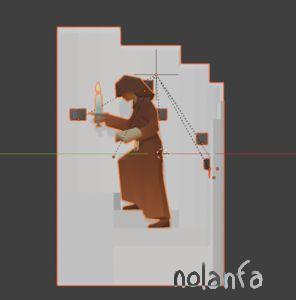
| computer-dwelling file: thin legs | 3D print file: thicker legs, heads and wings |
 |
 |
 |
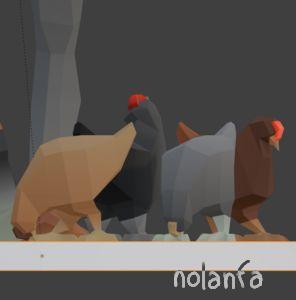 |
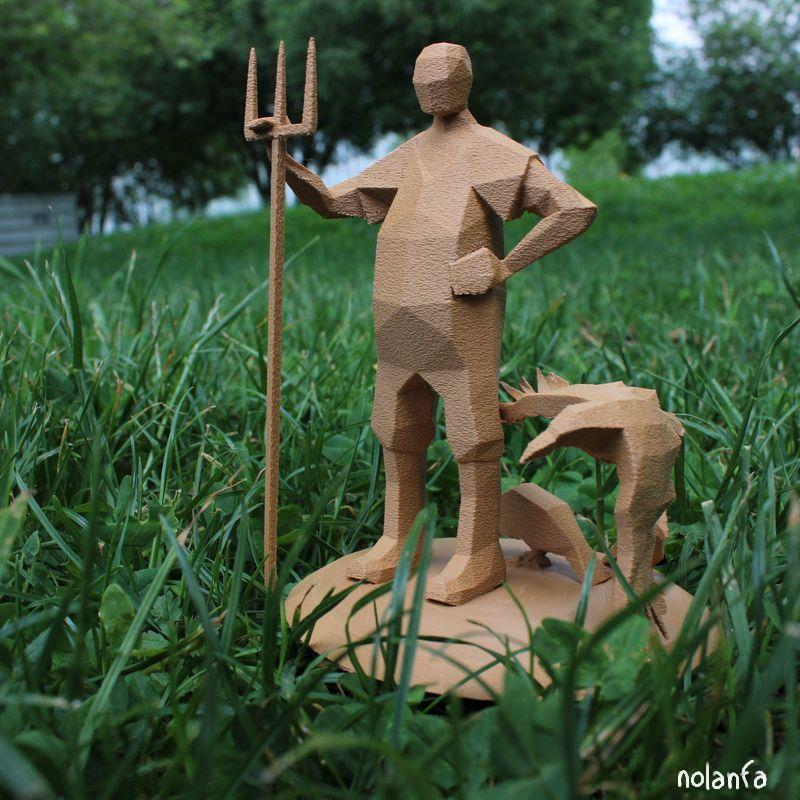
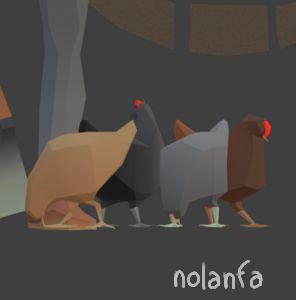
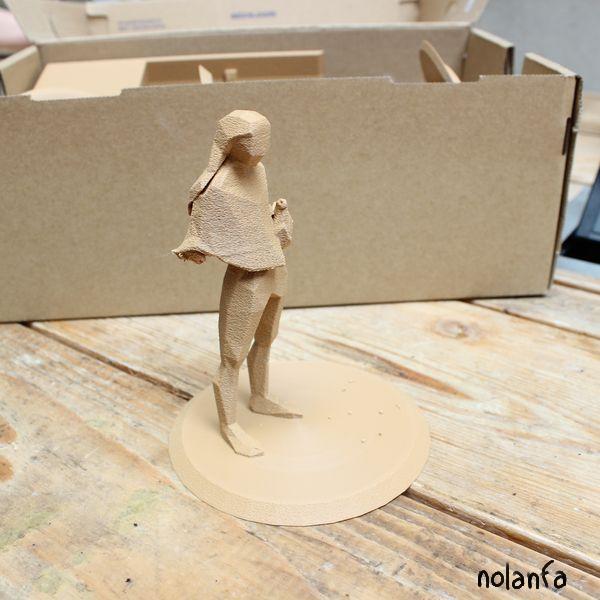
hermit v1: the hens failed to print, as well as the hoe and the arm whose weight it bore:
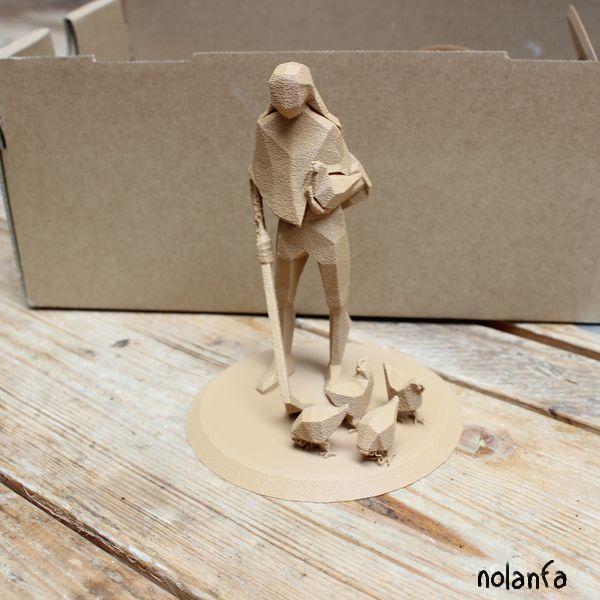
hermit v2: after the legs and heads of the hens and the hoe have been thickened, they printed successully and the feet do not look too thick even though on the screen they did:
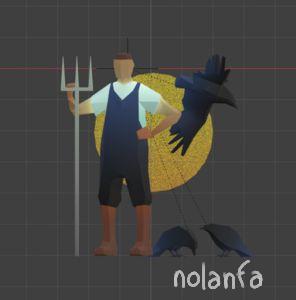
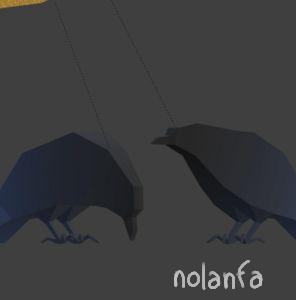
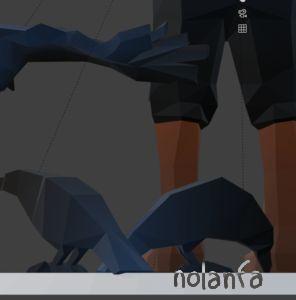
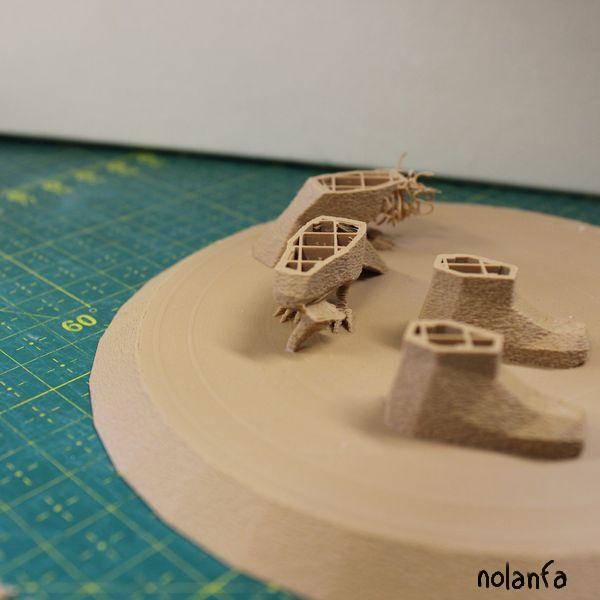
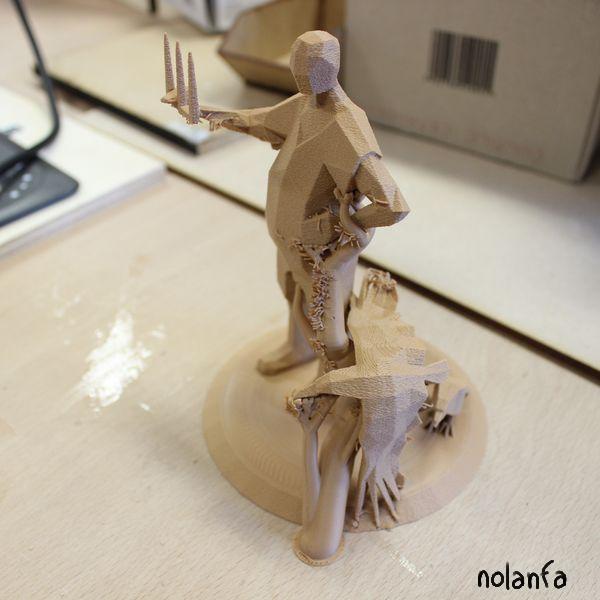
farmer v1: the foreground raven printed ok at first but then the head fell down because the beak was too thin a point of contact; the background raven has spaghetti from the third raven (the flying one) that didn’t print because of too thin wings. Printing was stopped midway:
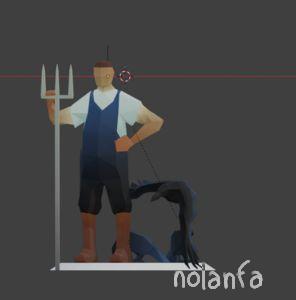
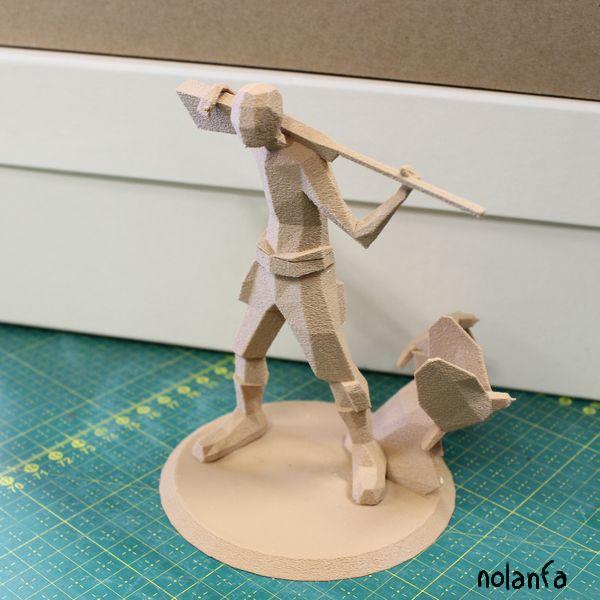
farmer v2: the heads and legs of raven were thickened, as well as the wings of the flying one. The pitchfork’s handle was printed separately lying down then glued on:
- You must remove non-manifold vertices/faces.
-
- Quick explanation of manifold faces: a 3D object designed to be printed is like a shape made of water, the faces being the surface of the water. It has a water inside and a non-water outside. If each face has one water inside side and one non-water outside one, which is correct for 3D printing, then it is manifold. It can have bubbles, so a piece of outside enclosed in the inside, but not two insides separated only by one face. The most frequent non-manifold configurations are a missing face (so the inside communicates with the outside: bad) and an extra face inside (so both sides of the face are inside: bad).
-
- note: 3D for background objects in games, on the contrary, being entirely virtual, doesn’t care about that and sometimes actively creates non-manifold objects for performance reasons
-
- To remove non-manifold vertices/faces, download a topology-checking tool (I use Blender’s addon Topology Doctor) to check your topology. Sometimes it tells me I have non-manifold bits and points me to what looks like a perfectly regular vertex, so I don’t fix it and it still prints, but do check and fix all you can.
- select all vertices and change normals to outside (alt N > Recalculate Outside). It is most of the time useless but the one time it isn’t you’ll be glad you did. If the normals are wonky and the slicer doesn’t intend to print some faces because of it, they should (in Bambu Studio; might work differently in another software) be dark green. Sometimes though they’re dark green and it’s fine.
-
- You should also be able to spot it by looking at the supports (assuming there is a part above it that it does intend to print, that suspended part will need excess supports). But in my characters there’s supports everywhere so it can be hard to see.
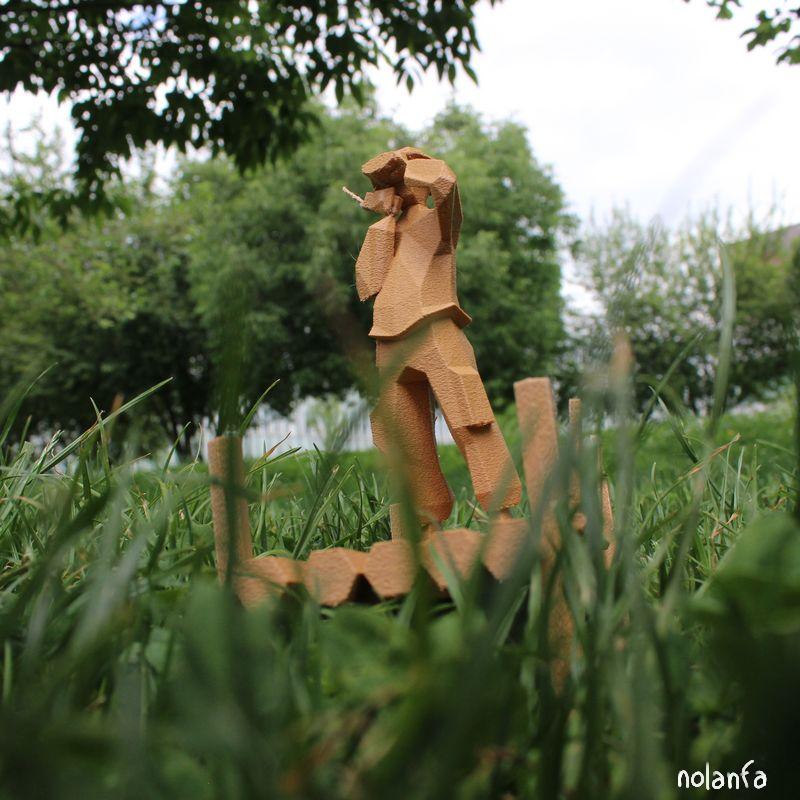
For some reason (normals issue) the printer file printed the bottom, the top, but not the belt in between. I re-printed just the belt and glued them together (with white wood glue):
 |
 |
- if you have mostly rectangular faces, know that the .stl will make them triangles (by cutting them in two diagonally). To be able to check how it will do that (which diagonal it will choose, how it will look at the end), you can add the Triangulate modifier (and keep the default behaviour of automatically applying all modifiers on export). If what you see doesn’t look good enough, you can then change the Triangulate options and/or move a couple vertices, now with a real-time preview.
- if you can easily do it, export your file into several different ones (by splitting character and background, or even cutting a character in several pieces; though do make a test to check for allowance for the width of the fuzzy skin, so that you’re sure it fits well together).
-
- I mostly didn’t, and I lost a lot of time and material every time a print failed ankle-height, since most of my material was in the base of the sculpture. While had I split them, I wouldn’t have had to reprint the base several times.
-
- For the naturalist/ranger/fire lookout, the platform when printed whole used a whole lot of material that wasn’t necessary anymore once I split it up and printed the horizontal part of the platform on the plate, separated from the legs of the platform (that I printed lying down, so they wouldn’t fall down)
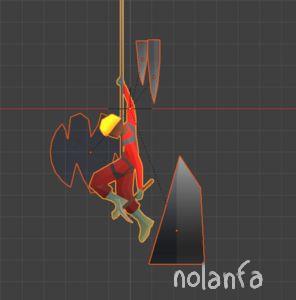
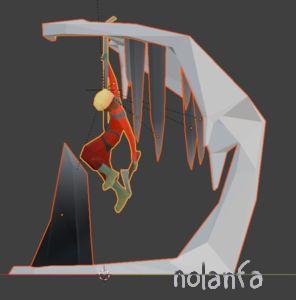
Fire lookout midprint (foreground): waste of filament on supports ((model: 84g, support: 62g, total: 146g)); additionally, both feet of the ladder should touch the ground but one seems to have fallen off:
Fire lookout split in parts with all supports still visible: much less supports (and wasted material) (model: 84g, support: 26g, total: 110g: we saved 58% in support weight, and 25% in total weight) than in previous version:
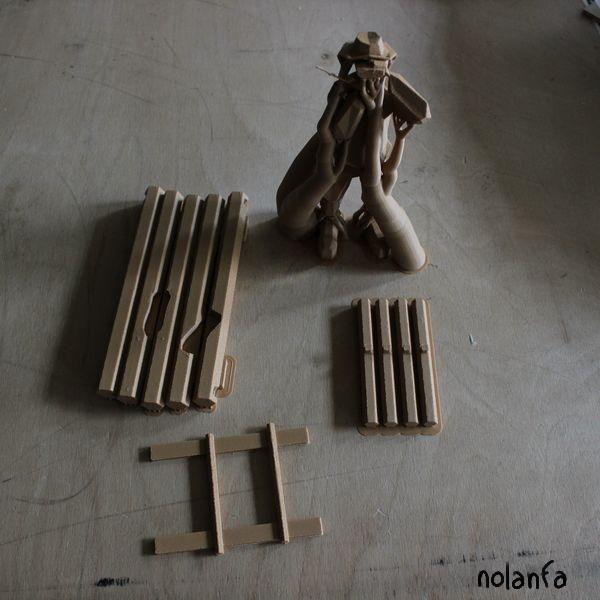
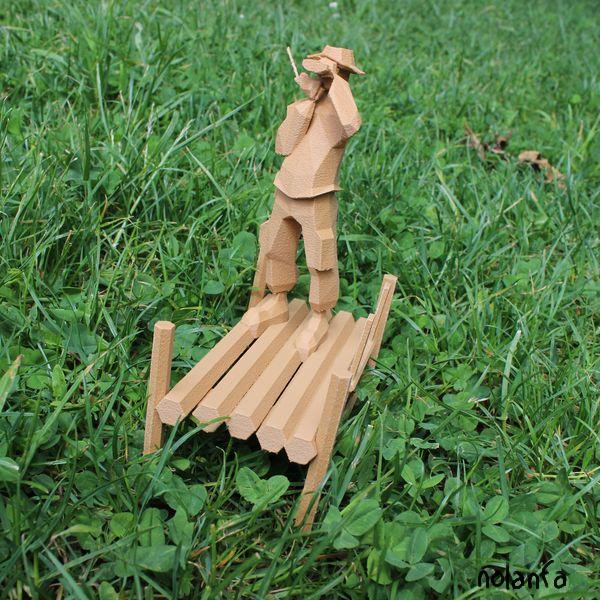
Fire lookout put back together: interlocking elements between the platform and its feet make it sturdy:
- if you’ve split your file, you can also stop the part of the print that fails and let the rest keep going (less waste, of both material and time)
- I haven’t yet found an efficient and reliable way to split the sculptures and wedge the different parts together that is not sculpting it by hand (emphatically not efficient). I haven’t been able to make the Solidify modifier and Boolean Substraction work consistently.
- most of the times I printed something long and thin standing upright (the farmer pitchfork’s handle, the fire lookout platform’s feet and ladder), it fell partway through. Print it separately, lying down.
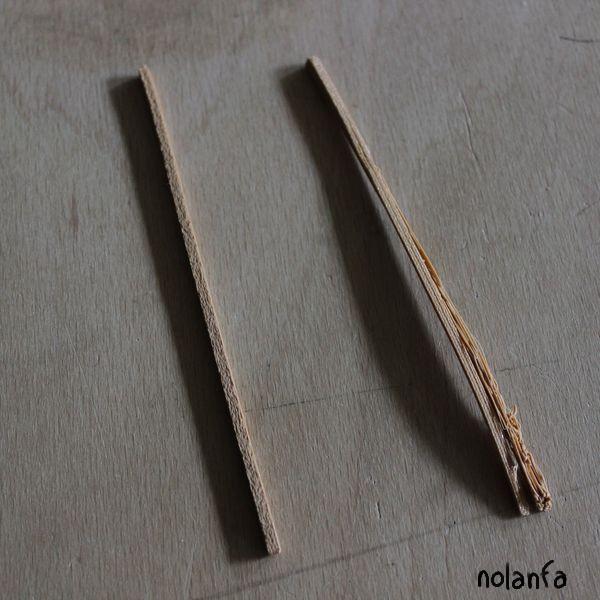
The handle of the farmer’s pitchfork fell off, so it made short spaghetti on the support along his foreground leg:
I had to print the handle twice due to a misprint: it wasted very little material as it was just a small part of the print:
Handle glued on: it works fine (though for a final version it would be best to print the whole pitchfork apart for sturdiness):